
Introduction
Today I am displaying a pen knife, intended to be used in scribal arts for cutting quills from goose feathers, scraping errors off parchment, etc. The knife was broadly based on period examples of scribal knives. It was created as a gift for a Laurel “secret-Santa” style gift exchange that was organized in the East Kingdom for Fall/Winter 2020-2021, where each of the participating Laurels was given a name and tasked with creating a gift for that person. This was my first knife and one of my first few blacksmithing projects. It definitely came out with a few places that weren’t completely ideal, but I’m overall pretty happy with this as a first effort. It was a great learning experience and I hope the recipient enjoys their gift!
Historical Context
The recipient for my Laurel exchange gift specifically mentioned she was interested in receiving a knife she could use for scribal arts. I had previously not created a knife, but I knew someone who had, and thought it would be an interesting project to learn how to create one. I talked with my friend Baron Fergus Redmead, and he agreed it would be a (relatively) simple project to learn, and he offered to assist me with training and the use of his forge. Lord Fáelán MacLochlainn also helped me out by training and demonstrating techniques for the blacksmithing and sharpening of the blade.
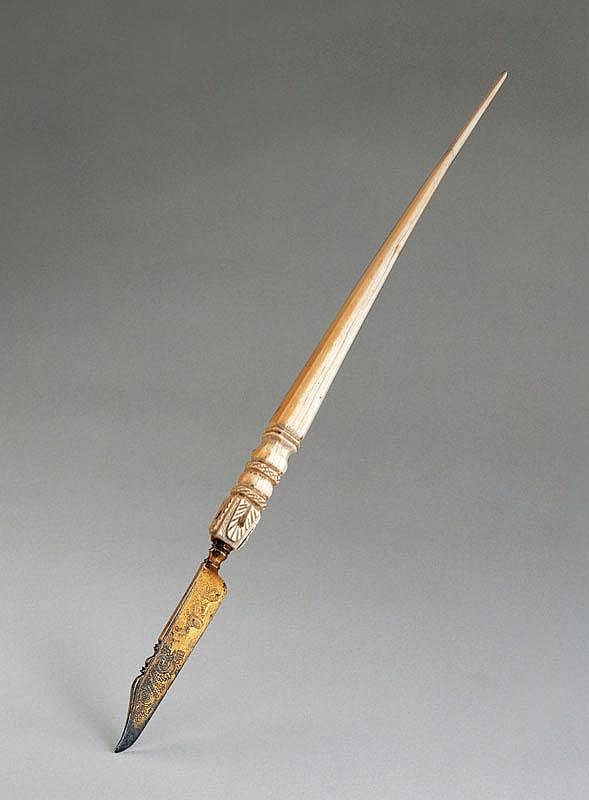
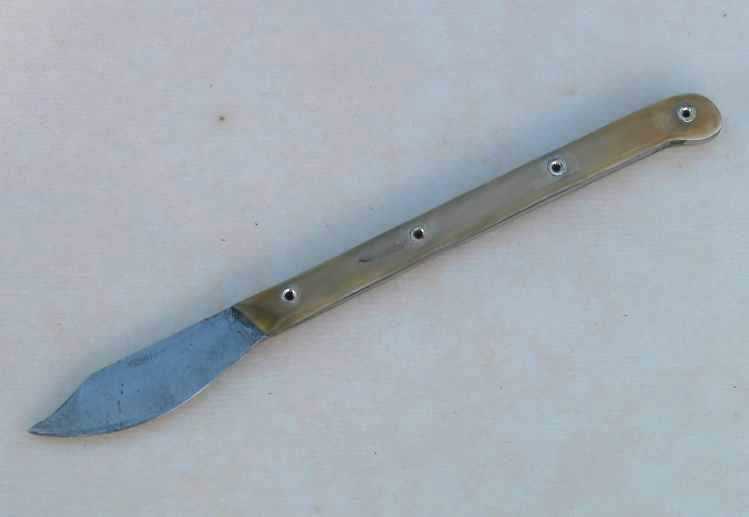
As an initial start, I looked online for examples of quill knives from the medieval period. The recipient’s persona is English/Scottish, 15th century. But looking online I saw that the images were relatively consistent in shape for pen knives – long, narrow, with rounded blades and angular tops – throughout the medieval period. As such, I decided to take one of these as an example and to play with the design.

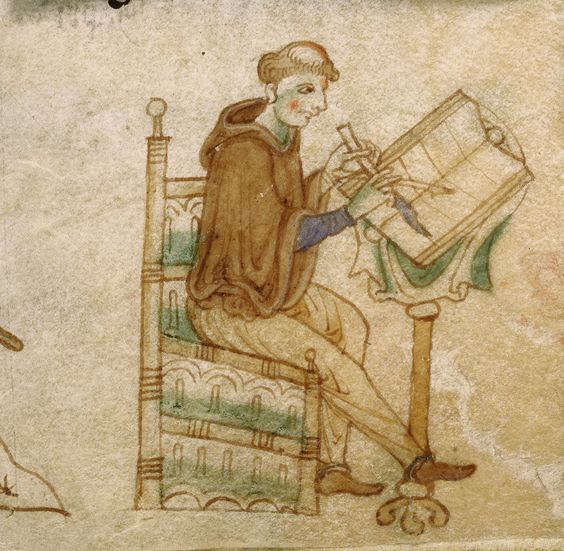
A medieval depiction of scribe holding a quill pen and a knife, from Canterbury, England. France or Italy, late 16th/early 17th cent. Royal 13 B VIII f. 22 The Gospels of Kildare Gerald of Wales, Henry of Saltrey, Topographia Hiberniae, Expugnatio Hibernica, Itinerarium Kambriae; De purgatorio sancti Patrici, Excerpts from the Chronicle of Eusebius of Caesarea, England, N. (Lincoln?), c. 1196-c. 1223 British Library English pen knife, circa 1500
Materials
- 1084 steel stock
- purple heart wood blocks
- 6ga brass rod for the handle pins
- epoxy cement
- boiled linseed oil
- vegetable tanned leather
- waxed hemp thread
- Titebond Genuine Hide Glue
- Fiebings alcohol-based leather dye
The steel is relatively similar to steel used in period. The handles of knives were commonly made of hardwood or bone. I decided to use hardwood for this project, as working in bone is not something I have experience with. I decided to use purple heart, although this is a New World wood, for the appearance.
Epoxy was used to join the wood and metal together until the pins could be set in the handle. This is a modern material – I’m not sure what would have been used in period for this purpose. Adhesives such as hide glue are documented in period, but I’m not sure that product would be efficacious for joining metal and wood.
Boiled linseed oil was used to protect the wood, as well as the metal of the knife to prevent rusting.
The sheath was made from leather, and sewn using hemp thread. The surfaces were glued together using hide glue, which is documented in period [Theophilus, On divers arts.]. Dying and other leatherworking methods have also been documented for the medieval period, in much the same format as used modernly (with the exception of some modern dyes/adhesives) [Izyumova, “Toward a history…”].
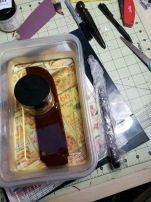
As this item had been dyed, I treated it with a product intended to seal the dye and to make the leather a bit more water resistant:
- Fiebings Resolene Finish (acrylic-based finish to seal and protect leather)
Methods and Construction
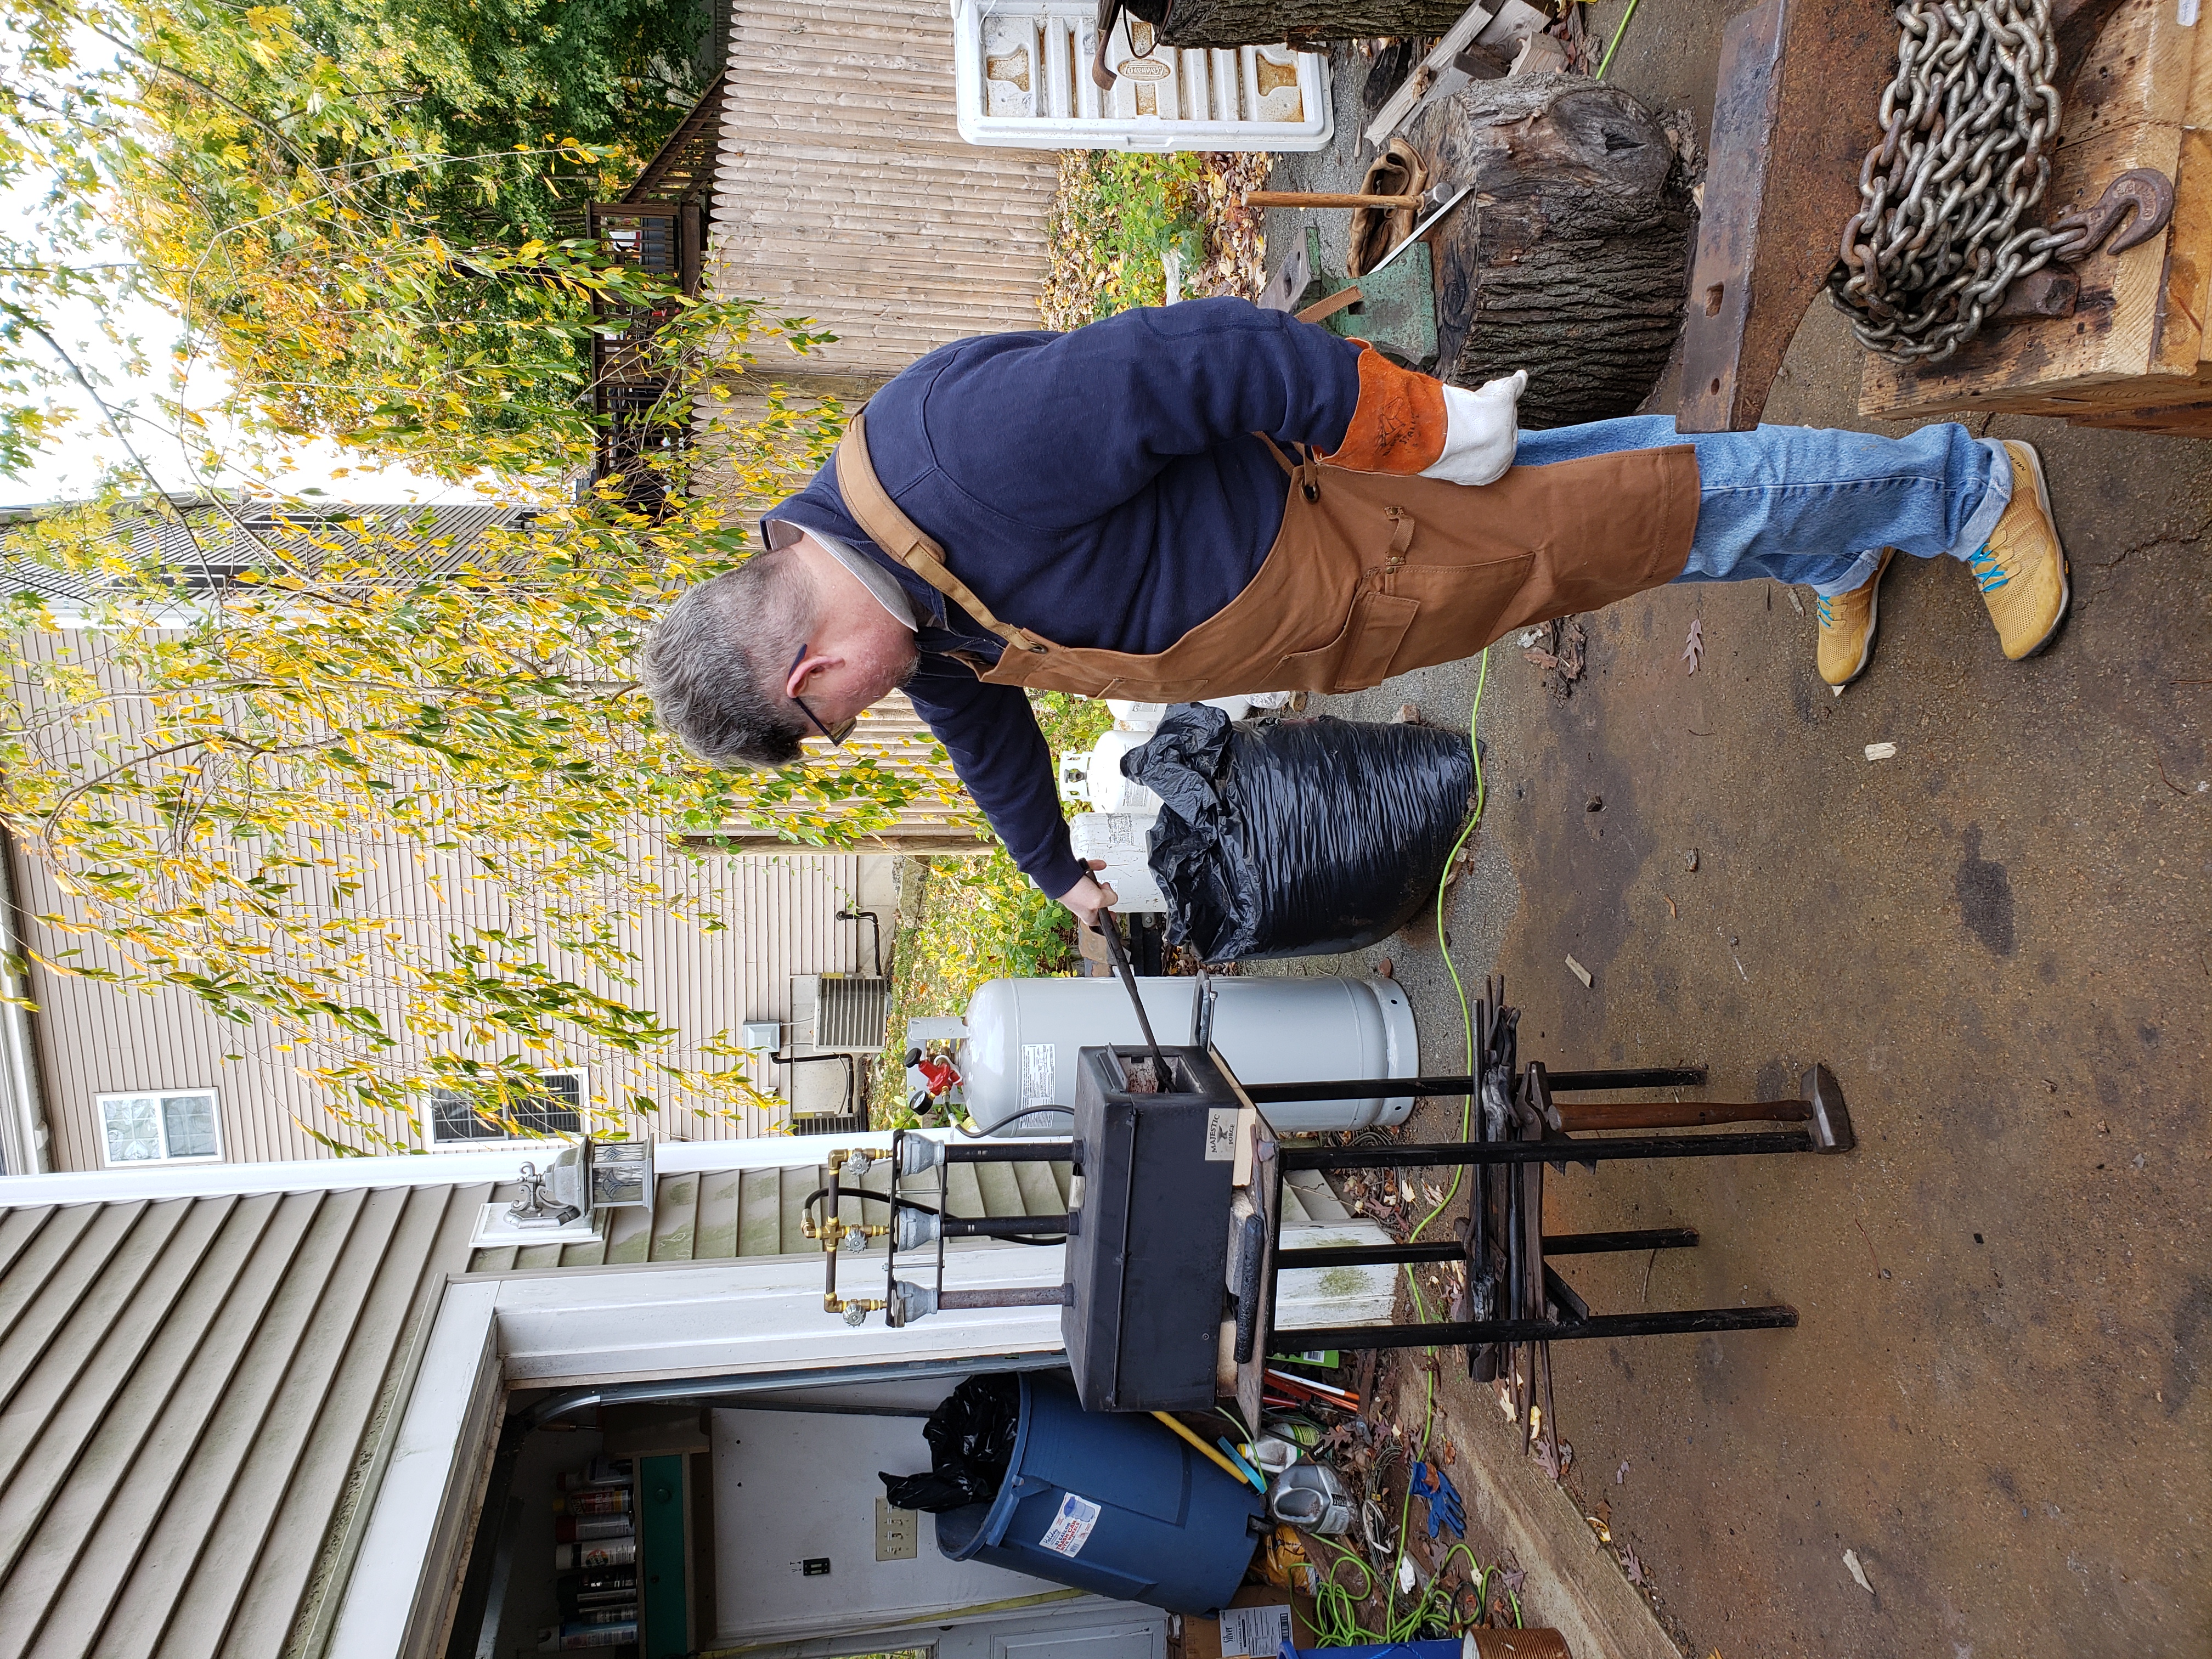
Based on the medieval examples above, I drew out a knife with a similar profile – a long handle and curved blade with a top that was concave, presumably as a location to place the forefinger when pressing down on the knife. A blank of steel was cut to length, then placed in the forge until it reached a nice orange/yellow color. I then started forging the steel in order to hammer it out to the rough shape. The steel could be worked for about 15-20 seconds, then needed to be heated again. Over time, the blade area started taking on the rough shape, and I hammered on the sides to rough shape the blade wedge.
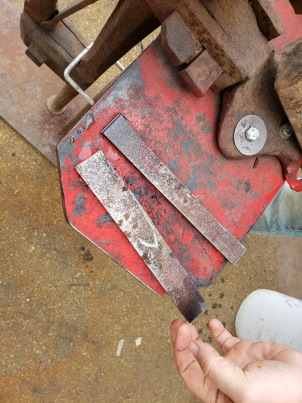
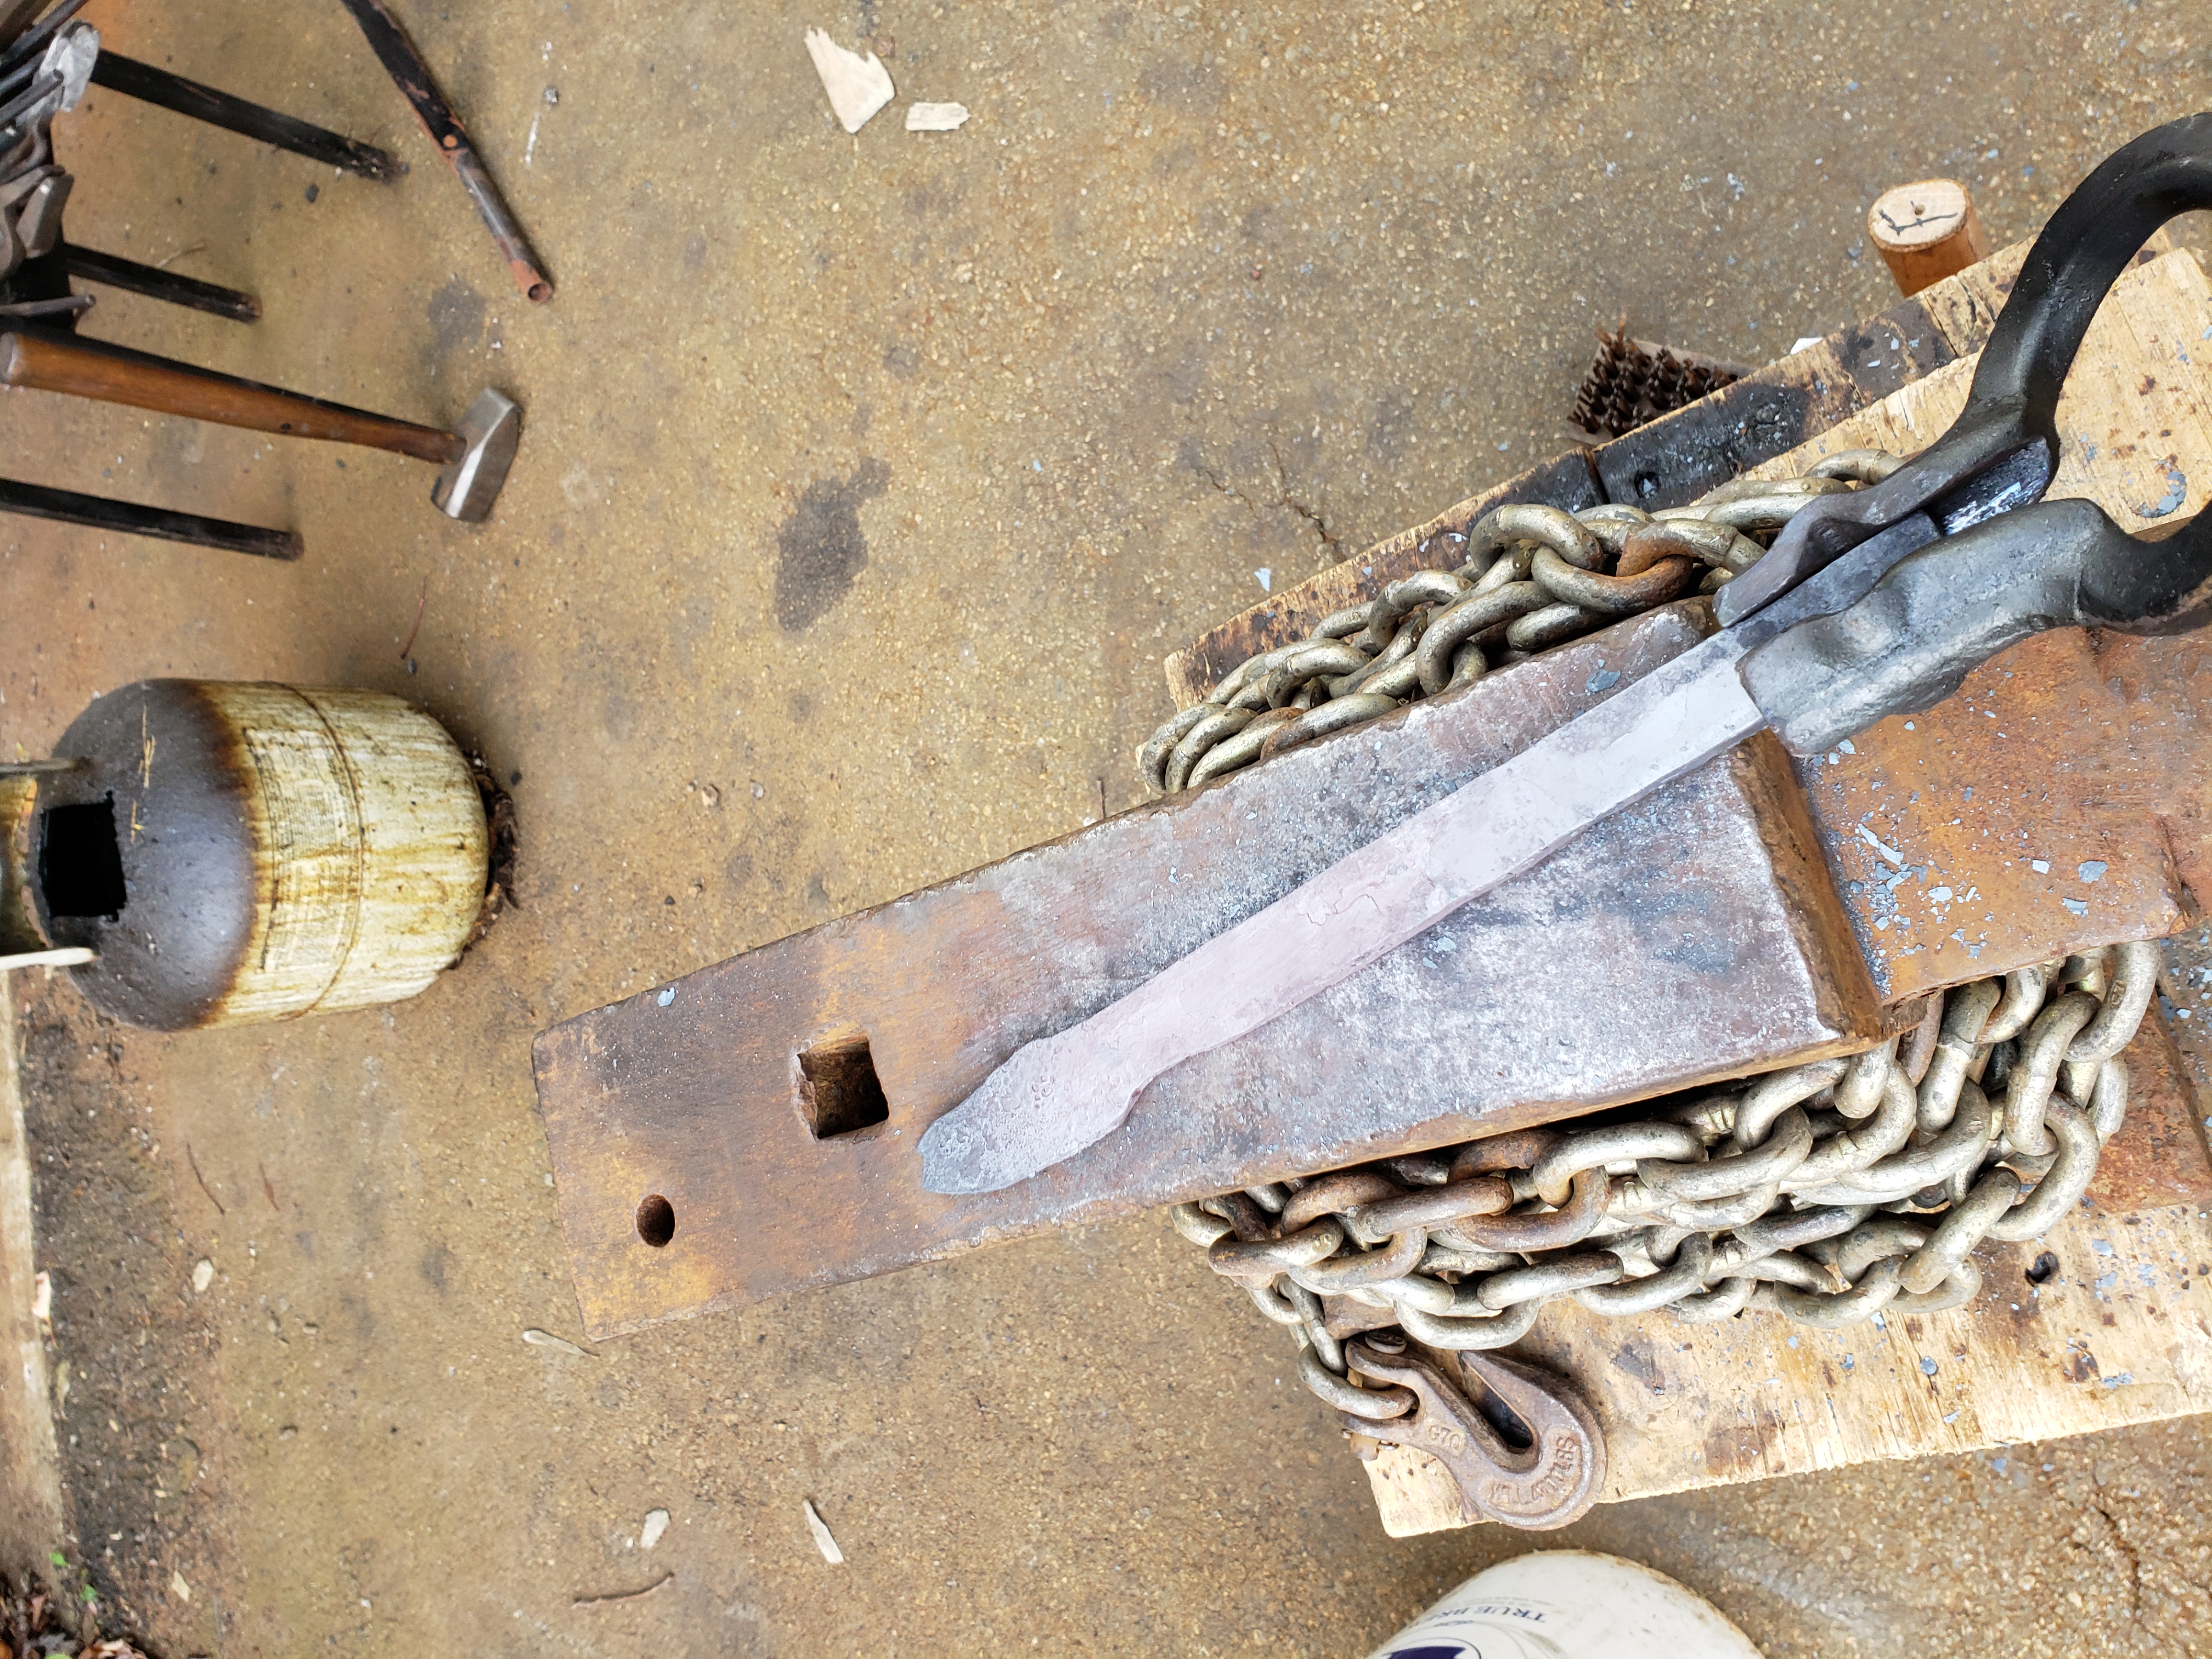
Cutting the steel stock to length. Heating the steel in the forge. Forging the blade and tang to shape. Putting the steel back into the forge for more heat. Rough shape completed.

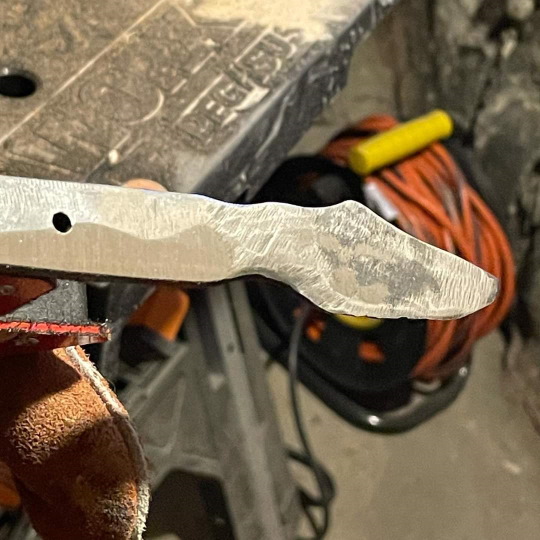
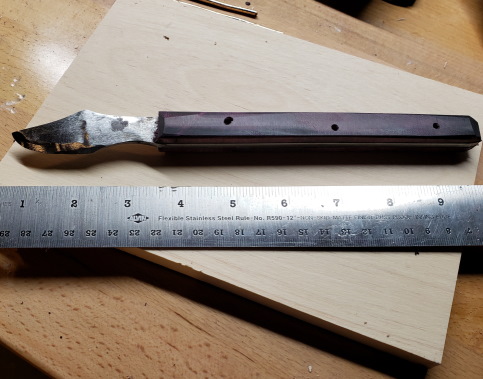
Once the rough shape was completed, I next started to clean up the blade to flatted out the tang (remove the wavy surface that resulted from the forging process), as well as removing the carbonaceous deposits on the surface. I did this using a belt sander and an angle grinder (when the belt sander happened to have a part fail). This got the blade closer to the expected shape by removing the “fish mouth” shape that was formed by the forging process, and started getting the tang smooth enough to be attached to the hardwood handle scales. Once it had been sanded smooth and the blade shape had been refined, we reheated the metal in the forge until glowing, and then dunked it in a vat of hot oil to temper the steel. This covered the blade in a new layer of black burnt grease that needed to be sanded off. Unfortunately, we discovered that doing so made the steel so hard, we were unable to drill holes in it for the handle pins. So, we had to reheat it, drill the holes, then temper it again, and sand it again to clean off the gunk. Lesson learned — next time, drill the holes first.
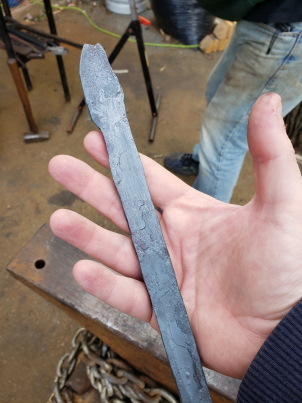
Grinding the surfaces smooth and even. Cleaning up the steel. Sanding off the crud after the blade was tempered Holes drilled, and retempered. Unfortunately, that means I need to clean off the black gunk again.
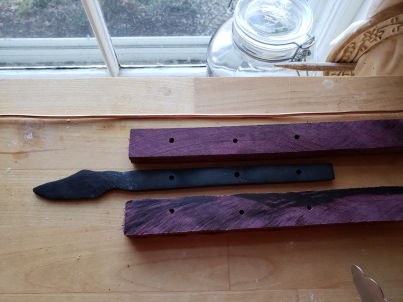
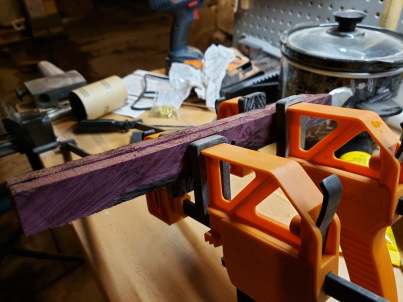
Once holes had been drilled and the blackened surfaces had been cleaned up again, the next step was to glue the wooden “scales” or blocks to the metal, so that they could be shaped on the belt-sander. I used temporary brass rods to line up the holes in the tang with those on the blocks, epoxied the three pieces together, applied clamps to hold it all together while the glue dried, then removed the pins before the epoxy dried. Once the glue was dry, I was then able to sand the entire knife on the belt sander to bring the wood thickness down and to round the shape of the handle to make it more comfortable to hold. Unfortunately the epoxy wasn’t heat resistant, and if the belt sander touched the metal enough to get it very hot, the epoxy had a tendency to delaminate. This resulted in part of one of the wood blocks splitting, and having to be epoxied back together. In the future, I need to find a different epoxy that can better handle incidental heat and vibration from the sanding process. The purpleheart had a tendency to char or blacken when worked on the belt sander, so once the shaping was complete, I hand sanded the knife to get all surfaces as smooth as possible, as well as to remove the char.
Gluing the knife together. Ready to shape the handle. Shaped and ready to pin

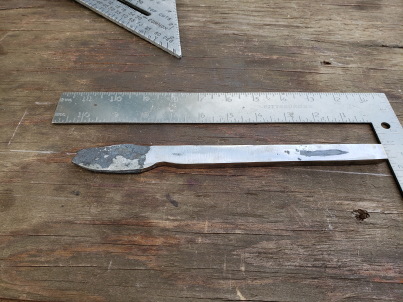
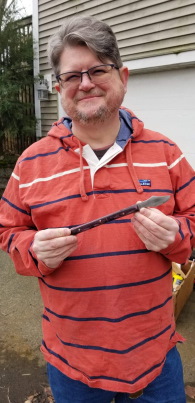
Once I had sanded the knife blade as smooth as possible with increasingly finer grades of sandpaper, the blade was already pretty sharp, but I honed it with an axe sharpener block. The pins were reinserted with epoxy to affix them into place, then cut to about 1/16″ protruding from either side of the handle. I peened these down flush to the handle, flattening them out somewhat to help hold the wood in place, then sanded them smooth on the belt sander. Once this was done, I applied boiled linseed oil to protect the handle, as well as to help seal the blade from rusting, and the knife was done!
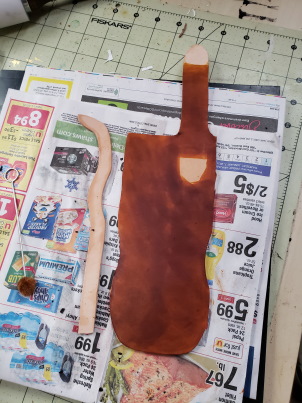
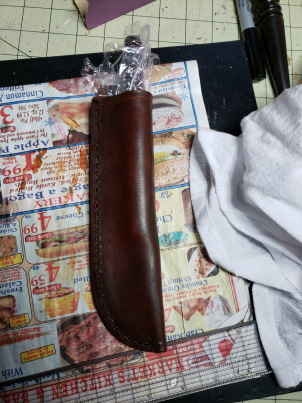
The only thing that remained then was to create a sheath for it. I patterned out the sheath using directions I found online, which included a folded middle seam, a last along the opening, and a folded belt loop. The leather was dyed except where glue was to be applied. The belt loop was glued into place, then I drilled holes and sewed it into place. The last was glued along the outer seam, then I folded the leather, glued it into place, and saddle stitched the sheath closed. Once this had been completed, I sanded the edges smooth, and redyed any spots that needed touchup. I thoroughly soaked the sheath in water to get it pliable, then inserted the knife (covered with Saran Wrap, to prevent it from getting wet and rusting) and wet-formed the leather to the shape of the knife, and let it dry overnight. I then applied two layers of Resoline to the leather to seal the dye, to prevent it from rubbing off onto hands/clothing. And, with that, the project was complete!
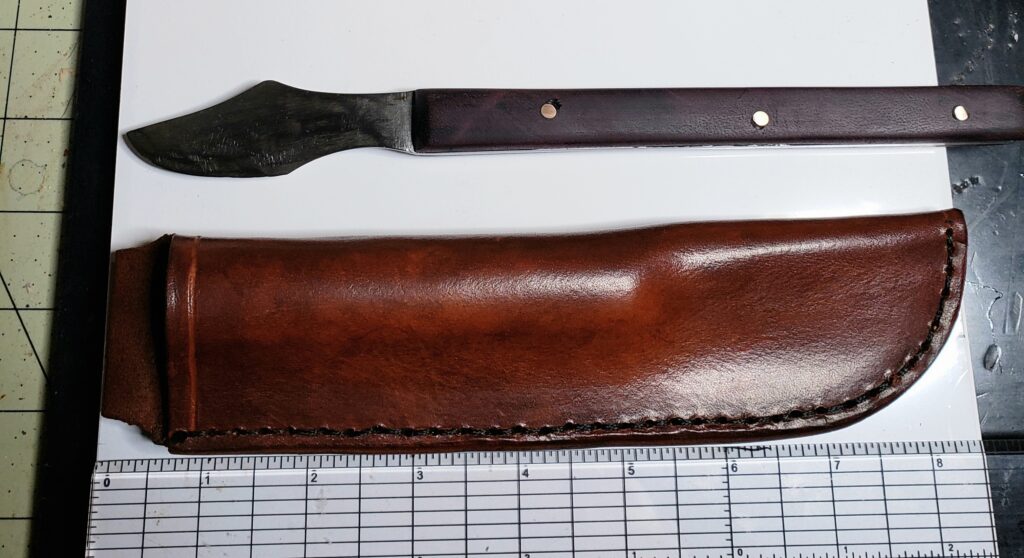
Dyeing the sheath Soaking the sheath Wetforming the sheath Finished knife and sheath.

Lessons Learned
As this was my first knife and first major blacksmithing project, I learned a LOT on this project. The smithing process was fun and I’m looking forward to my next knife. I learned quite a bit by the process of trying to move from one step to another, and discovering that I needed to back up and work on the previous step some more. Grinding and sanding the handle down, in particular, to get it flat was a process that took a lot more time than I had expected to get the sides completely flat and ready to epoxy. Because the sides weren’t totally flat and had a slight angle when I first started grinding, the holes were drilled somewhat out of parallel, causing the central hole in particular to be higher than the other two on one side and lower on the other. For next time, I need to do a better job of getting the sides flat and parallel so that the holes will be better aligned. I also now have a better idea how much/little the peening process will expand the size of the brass pin head; the expansion wasn’t nearly as much as I was expecting. I need to find a different epoxy which is able to handle heat better than the type I used. Finally, for the knife, using purple heart for the handle created a bit more difficulty than necessary. Sanding the purpleheart created a ton of fine purple dust which it turns out my allergies are sensitive to. Also, it chars easily when heated during sanding/sawing, and was more brittle than I expected, leading to a crack on one side of the handle. For my next project, I would use a different hardwood which is a bit more forgiving.
The sheath was more of a familiar area, as I had done leatherworking before, but the wetforming process was new to me. I actually created one sheath (seen in some of the pictures, with a wavy outer edge), then decided it was too small and wouldn’t fit the knife (despite the measurements I had done). I scrapped it and created a new one that was a bit wider. During the wetforming, I realized that soaking the sheath in water makes it much more pliable than expected. I now think the original sheath would have been doable after all. Lesson learned, trust my measurements. The hide glue was a bit of a mess on this project. For future sheaths, I would probably go with a modern contact cement to join the leather surfaces, which would hopefully dry faster. I also learned, dye first, then glue. When I glued the second sheath together, I found that areas the glue had touched (even incidentally) didn’t dye as well. I ended up fixing this by lightly sanding the areas which refused to dye with 400 grade sandpaper, then reapplying the dye. Finally, I had been using lacing chisels to cut holes in leather for sewing seams together, which was a tedious process and often created holes that were too small and needed to be expanded by an awl. I saw a great idea online of using a drill press to create the holes, which turned out to be much more efficient, and which I intend to continue to do going forward.
Bibliography
- Charlotte, Ron (in SCA, known as Al Thaalibi). “Medieval Leather Dying.” 1996. Downloaded September 2020 from http://www.personal.utulsa.edu/~marc-carlson/leather/ld.html
- Theophilus. On divers arts. New York: Dover Press, 1979. ISBN 0-486-23784-2.
- Изюмова, С.А. «К истории кожвенного и сапожного ремесел Новгорода Великого.» Материалы и исследования по археологии СССР. 1959 (65), с. 192-222. / Izjumova, S.A. “K istorii kozhevennogo i sapozhnogo remesel Novgoroda Velikogo.” Materialy i issledovanija po arkheologii SSSR. 1959 (65), pp. 192-222. [“Toward a History of the Leather and Shoe-working Arts in Novgorod the Great.” Materials and Research on the Study of Archeology of the USSR.] Translation to English available on my blog at https://rezansky.com/leatherworking-and-shoemaking-in-novgorod-the-great/.