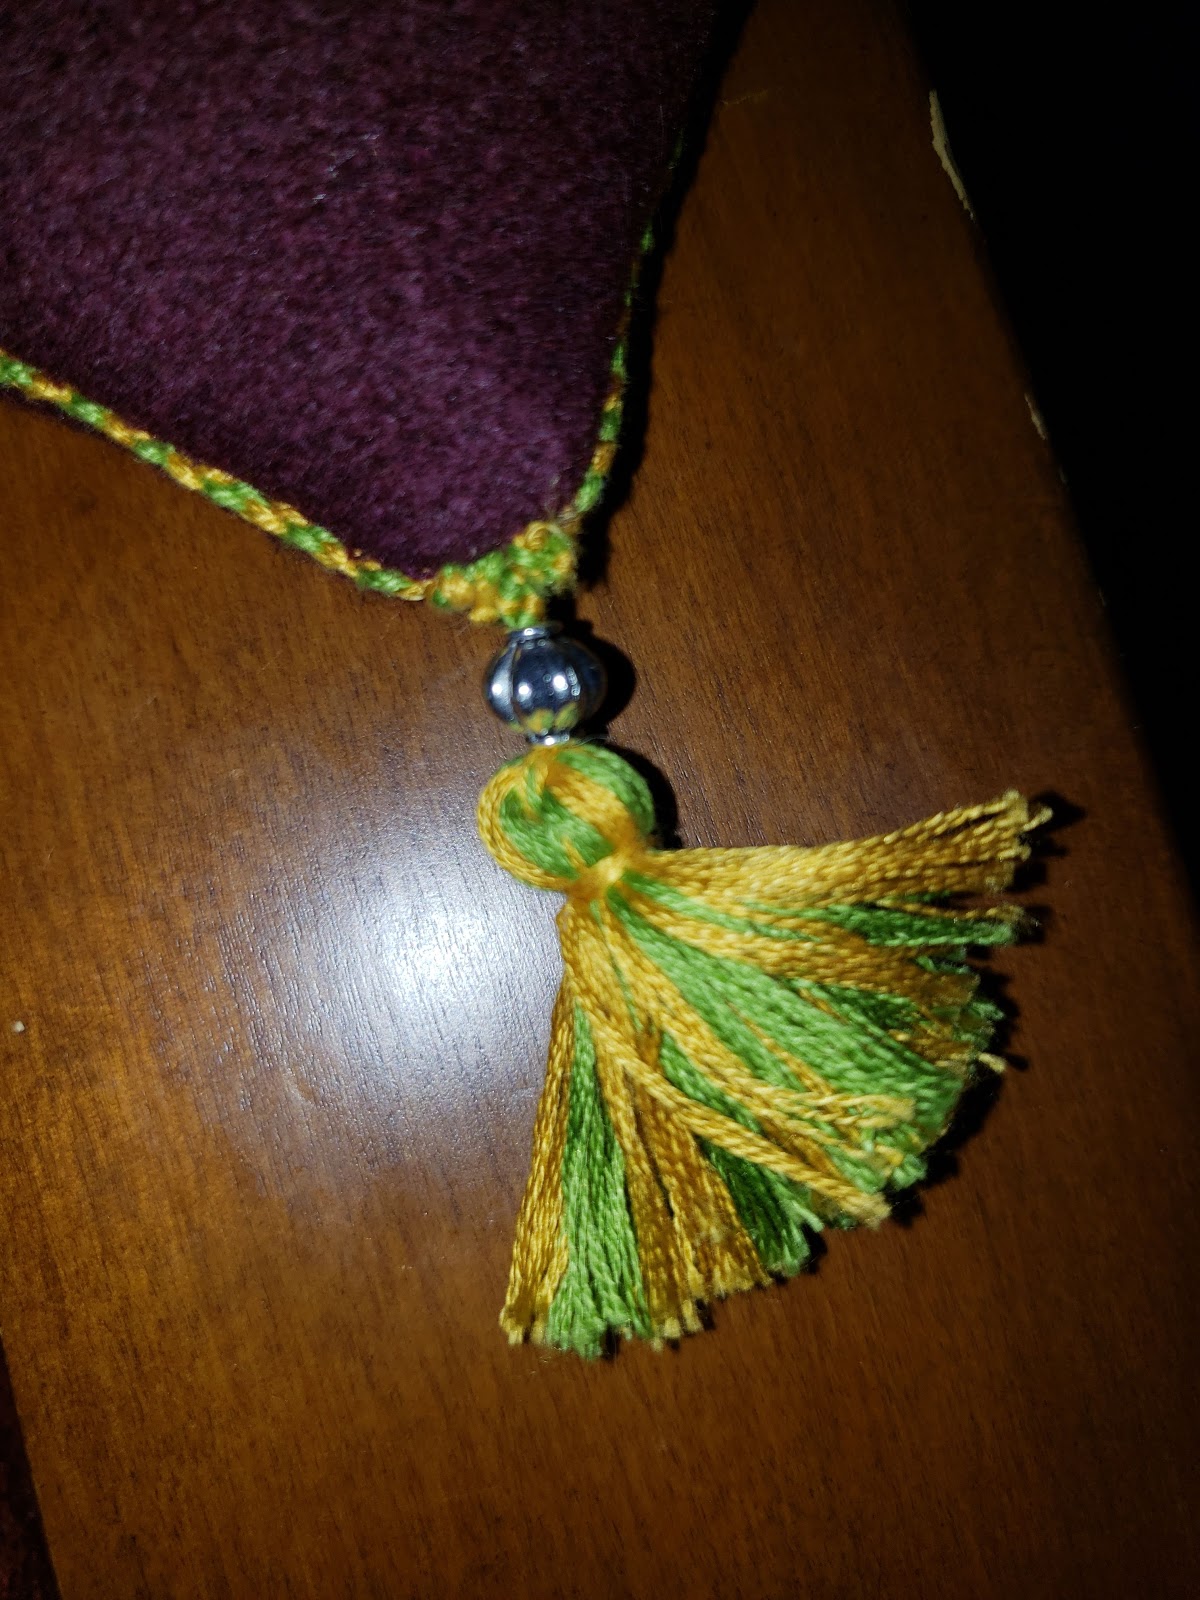
For a recent project, I decorated my new pouch with several tassels. I had not made tassels in quite some time, so I had to re-educate myself on how best to do them. After some experimentation, here’s what I came up with.
The pouch I was making featured some Or nue embroidery that was in green and yellow, so I picked floss of the same two colors for the braided cord and tassels. I worked the tassels in DMC cotton floss because of time and cost – getting enough silk in the right colors would have taken a few weeks in the mail, and would have been relatively expensive. The tassels here were completed using two skeins of DMC (one of each color).
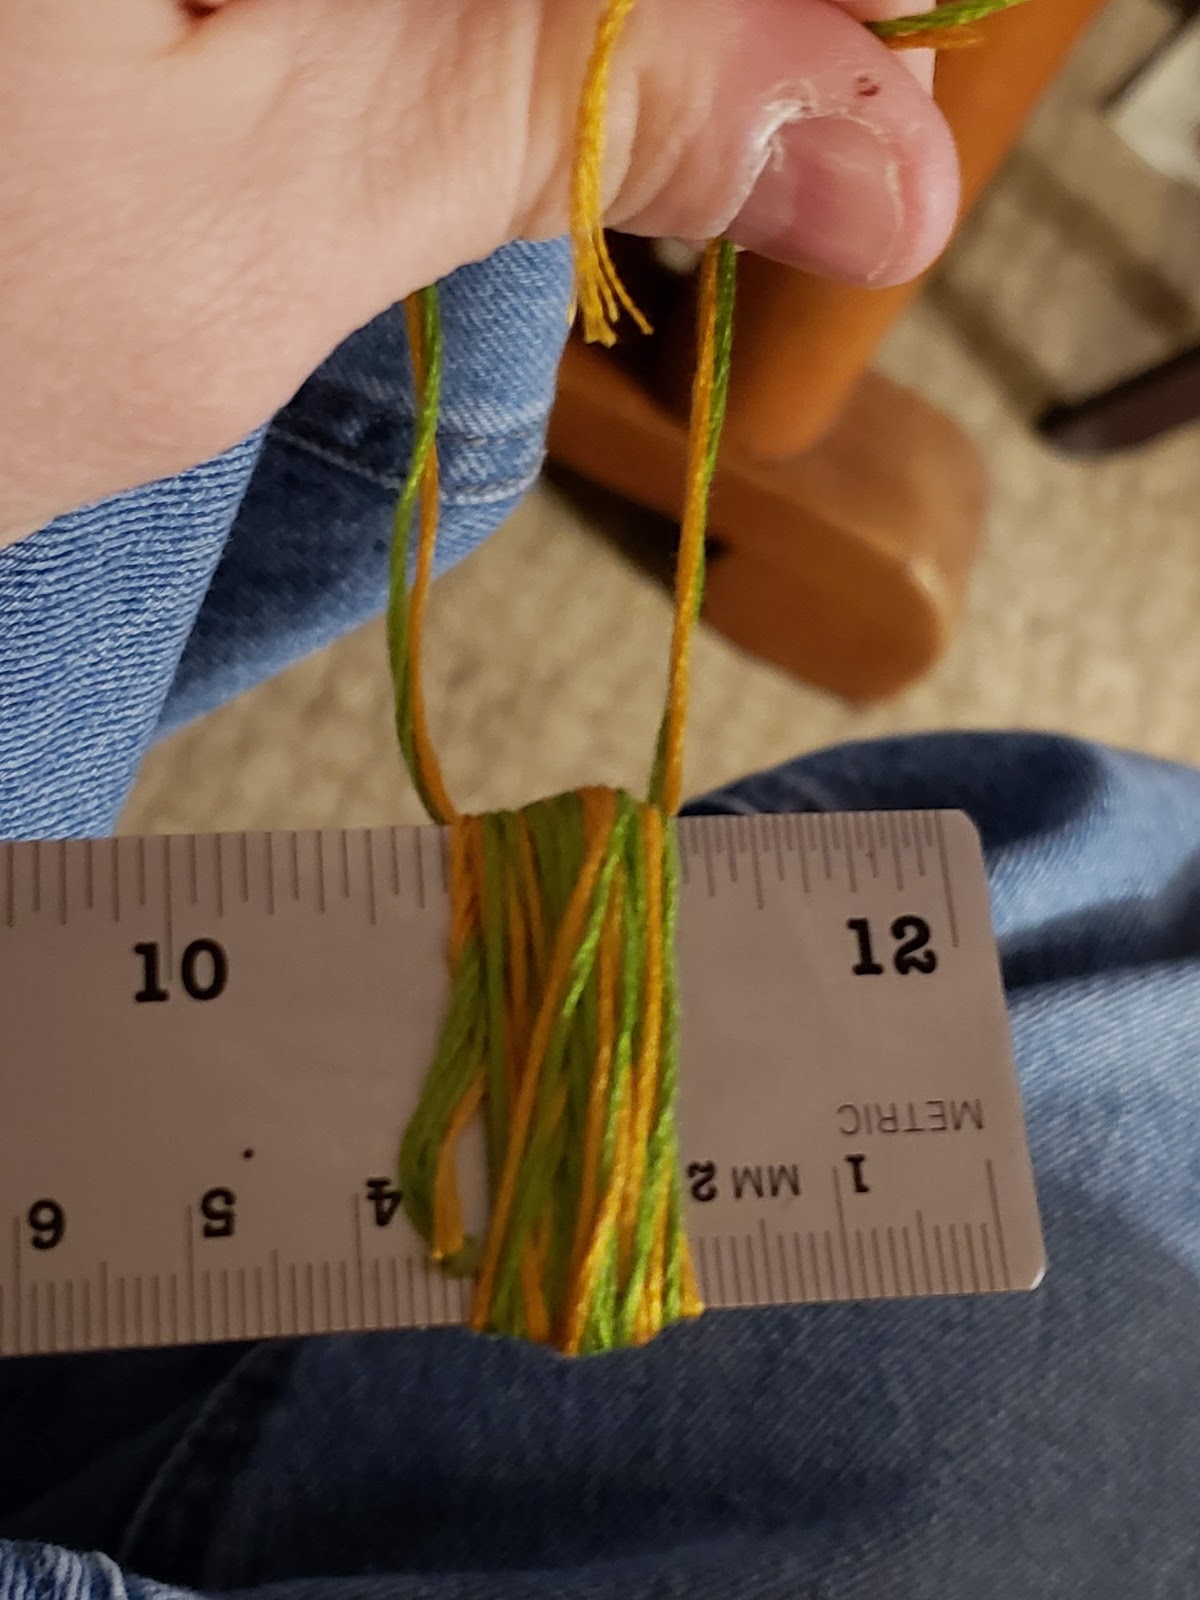
The tassels were made by wrapping embroidery floss around a mandrel. I used a ruler as my mandrel, but any squarish object could be used as your mandrel. You’re basically just using it to easily create a number of loops of floss of the same size. The ruler I had happened to be the right width for my project, and had a cork backing which created a couple channels where it was easy to pass a needle or use scissors to cut the loops.
The first step was to wrap my embroidery floss around the ruler. I wrapped green and yellow at the same time about 25 times to create the body of the tassel. Pick one end (we’ll call this “down”) and have the floss both start and end in that direction. In this picture, I’m calling the lower edge “down”.

The next step was to cut a string about 14 inches long. I actually cut two strings, one gree and one yellow, and passed those threads through the body loops. I then tied it into a knot at the top to cinch the body loops together. Once knotted, you’ll use these strings to tie your piece. Cutting the strings 14 inches long gives you lots of room to play with when it comes time to attach your tassel.
Now that all the loops were tied together, I cut the loops across the bottom of the ruler. This basically gives you 50 or so pieces of string knotted together at the top. To turn this into a recognizable tassel, I cut another piece of your floss about a foot long. I wrapped the string around the body, and knotted it off with a square knot to create the tassel’s head. I trimmed off the extra length.
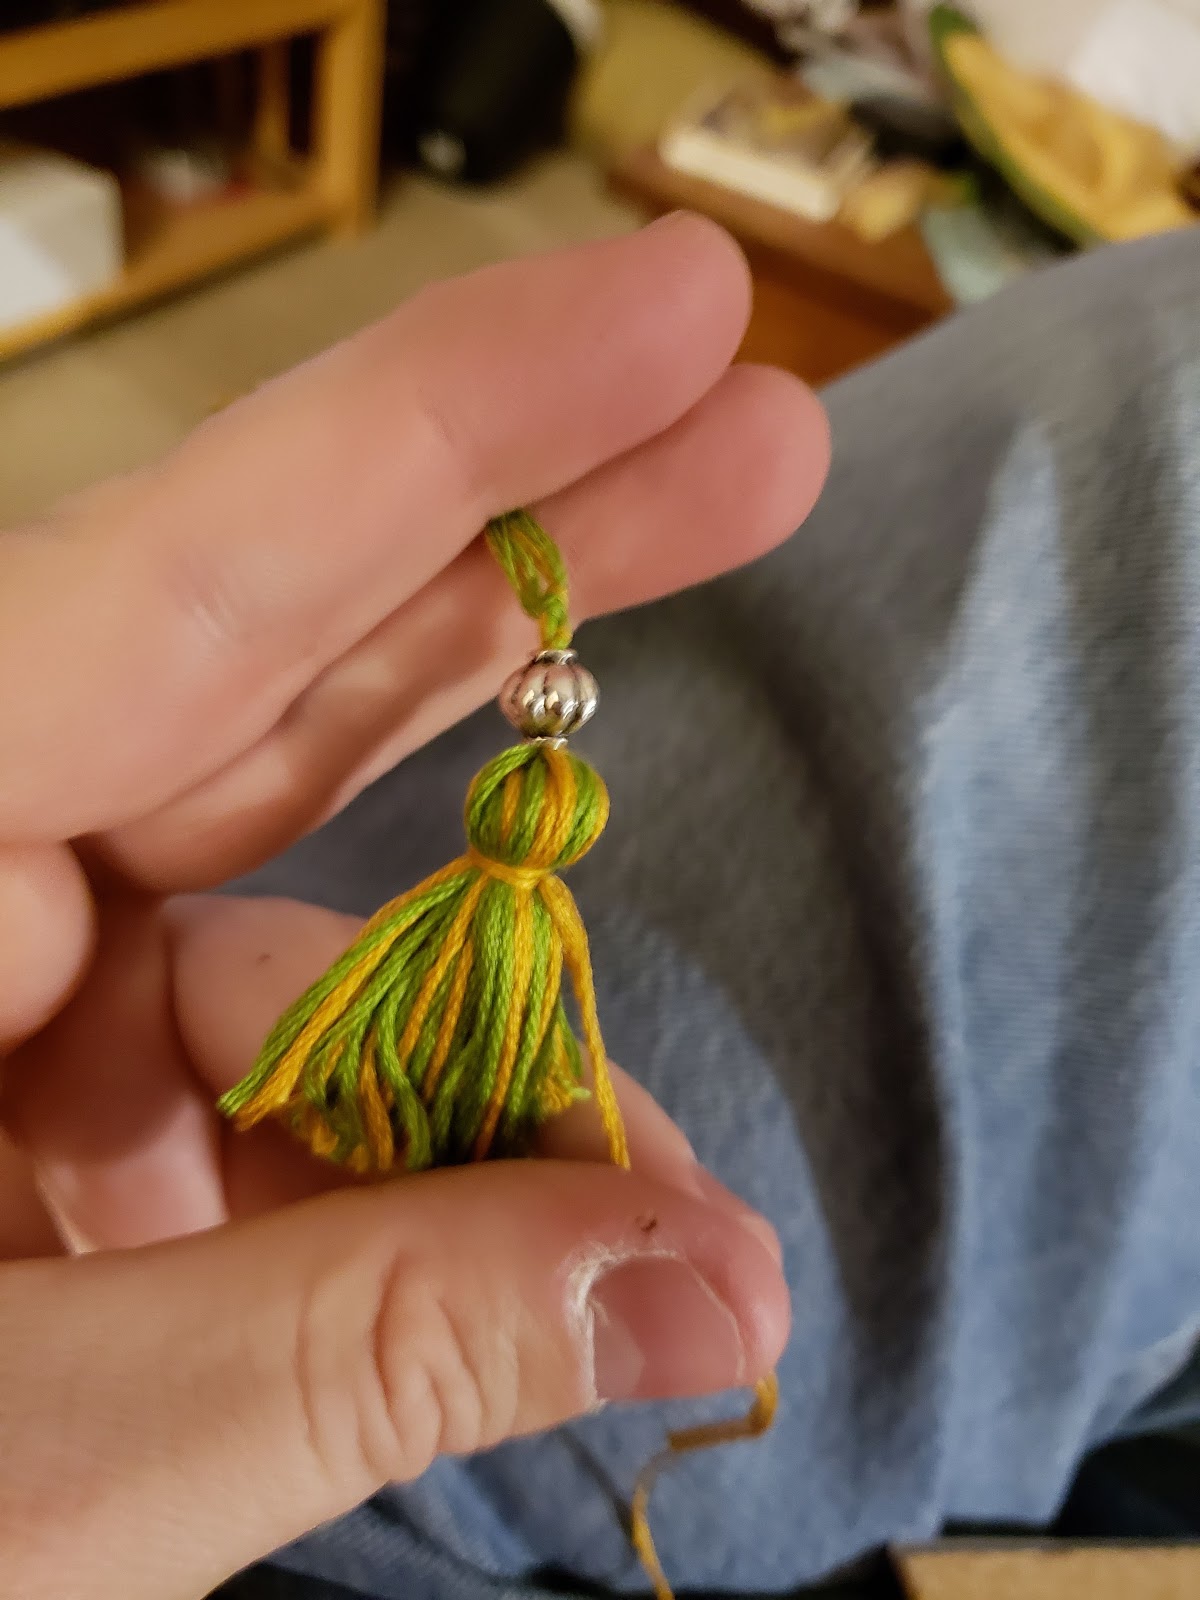
Finally, I trimmed the tassel so the strings are all roughly the same length, and as mentioned above, I used the strings at the head to connect the tassel to the body of my pouch. I chose to run the strings first through a silver bead before sewing them to the pouch fabric. Trim all the knots, and voila!